6×14 Backpack – Tutorial
Getting started with the 6 Digit 14 Segment i2c Backpack.
<Assembly instructions and images to be added here>
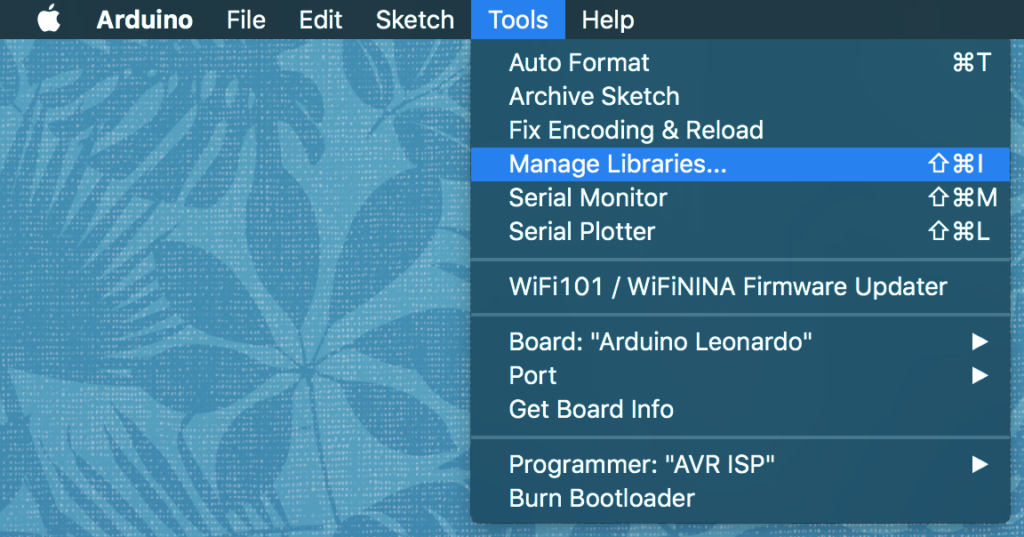
To install the library for the backpack, open your Arduino application and select the Tools menu and then Manage Libraries…
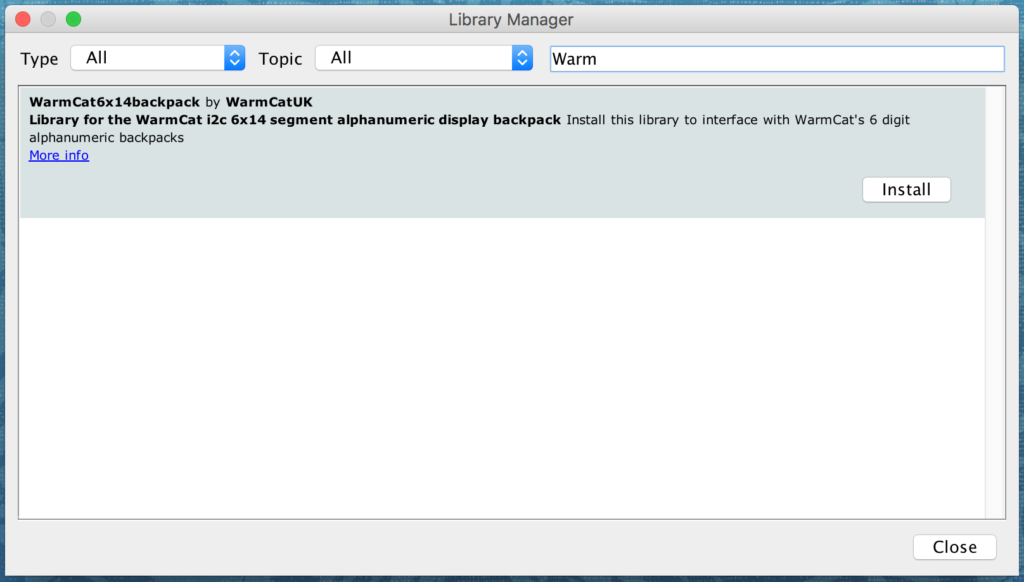
The library window will pop up and begin downloading the library index. Once complete, click in the “Filter your search…” box and type “WarmCat”.
You should see the “WarmCat6x14backpack” library appear like in the following image:
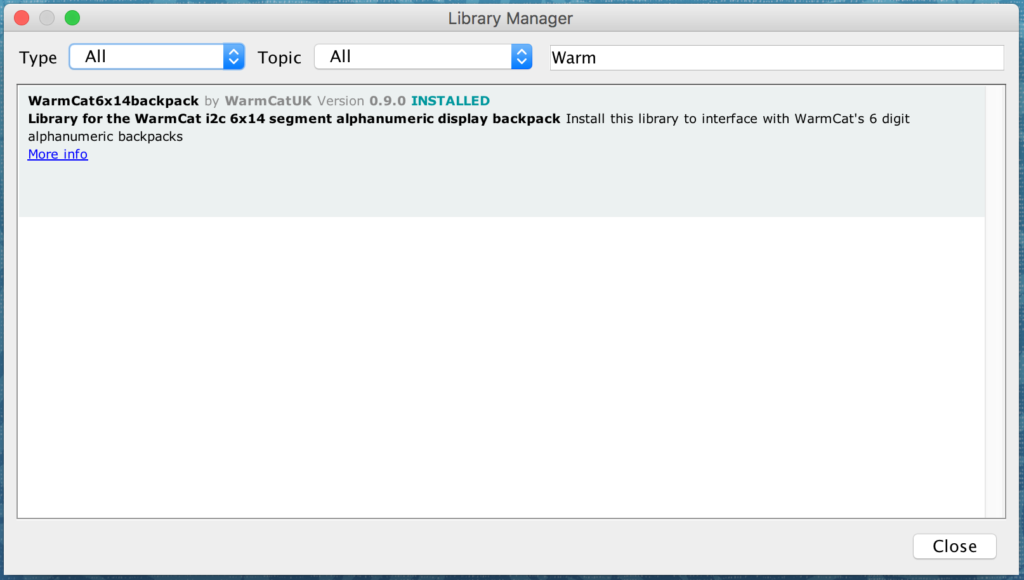
Simply click install, and once complete, it should show “installed” like the next image:
Load up the example code next.
Select File menu, then Examples >, then scroll down to Examples From Custom Libraries, and under this heading you will find WarmCat_6x14Backpack >, then select WarmCat_6x14_example.

Connect the backpack(s) to your Arduino:
SDA – Uno pin A4 (Leonardo/Pro Micro pin 2)
SCL – Uno pin A5 (Leonardo/Pro Micro pin 3)
VDD – 5v/3.3v
VI2C – Logic voltage (Uno/Leonardo use 5v)
GND – GND
For most uses, VI2C can be linked to VDD, this is just in case you want to drive the backpack with different logic voltage than the power voltage.
If you are using an Arduino Uno, just connect both the VDD and the VI2C to 5v.
If you are connecting only one backpack, then change the line:
WarmCat6x14 myDisp(2);to:
WarmCat6x14 myDisp(1);Upload the code to see the display come to life and run through the example demo.
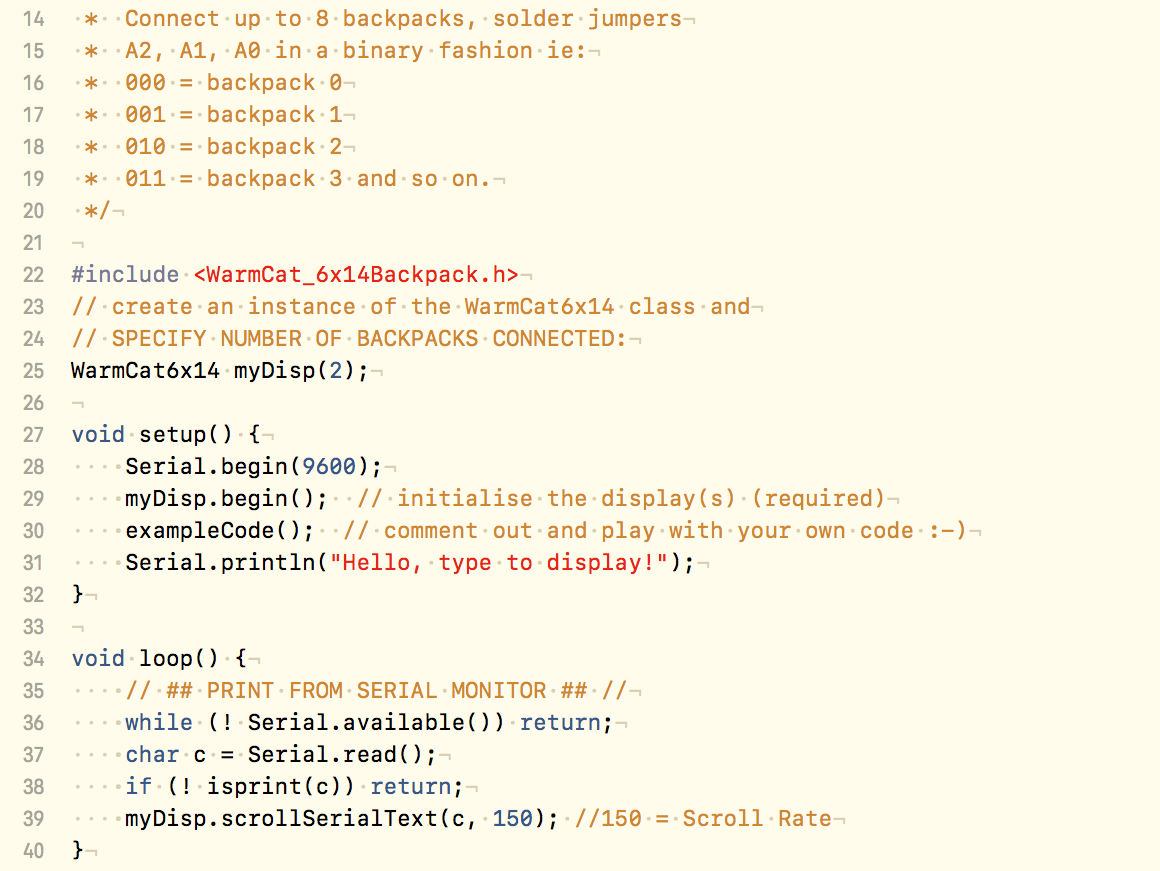
If you are using more than one display, then you need to solder the jumpers A0, A1 and A2 accordingly; the first display requires no jumpers soldered, the second and subsequent displays require the jumpers to be soldered like so:
A2 A1 A0
 0  0  0  - backpack 0
 0  0  1  - backpack 1
 0  1  0  - backpack 2
 0  1  1  - backpack 3
 1  0  0  - backpack 4
 1  0  1  - backpack 5
 1  1  0  - backpack 6
 1  1  1  - backpack 7
If required, specify the number of backpacks by amending the line of code:
WarmCat6x14 myDisp(2);Once the program has run through the example demo, you can open a serial monitor and the display will scroll whatever you send through the monitor. Set the serial monitor baud to 9600.
<More images to follow>
The example code is well documented, so it should be easy enough to play with it to get the desired result for your project.
Any suggestions or bug reports are welcome via pull request / issue at the GitHub Page.
See more about the 6×14 Segment Backpack in this post.
You have helped me out without even knowing it ..lol
love your WarmCat info. I’m using your program with a few minor adjustments to fit my project, I’m not a programmer, just a retired nerd with too much time on my hands.
My question is where can I find the FONT for (\n) command? in the set up files/ library. Would like the “enter”or “new line” command to be displayed on the VFD display as special char.
I have succeeded in getting a char displayed for \n, but no luck in “customizing” it. I can alter any/ all the printable ascii char in the font table but not \n.
Any guidance would be much appreciated.
Thanks
Daniel
fyi my display project here on youtube using your program https://www.youtube.com/watch?v=EcxCmK0OsiY
There isn’t a font/character for newline, but perhaps there should be!
Not sure if we would need to look for CR or LF.
Your project is amazing by the way.
I’ll have a look at the code today and get back to you.
I never did get round to this. Looking at it today, I think the easiest thing would be to test for CR/LF in your code (rather than the library) and just call clear().
Apologies, hectic life!